Selecting flowers that are well-suited to hot weather is crucial if you want your garden to thrive. You should choose varieties that have adapted naturally to the scorching sun and require minimal maintenance. With careful selection, your garden will look beautiful even in the hottest summer days.

The Zinnia is an amazing flower that flourishes even in extreme heat conditions. It has a unique ability to withstand drought and still produce a wide variety of colorful blooms that are truly breathtaking. This tough plant is ideal for those who prefer low maintenance gardens because it requires minimal watering and can handle direct sunlight without losing its beauty. If you want a garden that can withstand the heat, then the Zinnia is definitely a top choice.

If you’re looking for a plant that can thrive in hot weather, Marigold is a great option. These happy little flowers not only add a splash of color to your garden, but they’re also incredibly tough and can handle high temperatures without breaking a sweat. They’re perfect for people who don’t have a lot of time to tend to their garden, or for those who live in areas with blistering summers. And with their bright shades of orange and yellow, Marigolds are guaranteed to bring some cheer to your outdoor space.


If you’re searching for a flower that is both fragile and can endure high temperatures, the graceful Portulaca could be the one for you. This small, attractive plant is a genuine treasure in warm climates. Its fleshy leaves allow it to conserve water, making it an ideal choice for dry areas. The Portulaca comes in various colors, ranging from subtle pastels to bold pinks and purples, giving your garden a touch of sophistication without requiring too much maintenance.

The Blanket Flower is a tough and adaptable plant that is perfect for hot climates. Its colorful, daisy-like blooms are able to survive both scorching temperatures and dry conditions, making it a popular choice for those who prefer low maintenance gardening. The Blanket Flower is also a magnet for bees and butterflies, bringing life and energy to your garden while simultaneously supporting the surrounding ecosystem. The flowers themselves are an explosion of fiery red, orange, and yellow hues, creating a breathtaking sight in any outdoor space.

If you want to have a garden that can blossom even in scorching weather without putting in too much effort, there are various flowers you can opt for besides the ones mentioned here. For instance, Lantana, Black-eyed Susan, and Cosmos are some other options that can tolerate heat quite well. By picking a variety of flowers that are suited to high temperatures, you can create a colorful and thriving garden with little maintenance needed.

In summary, do not allow the intense heat to discourage you from having a gorgeous garden. You can opt for low maintenance flowers that are designed to endure high temperatures and create an attractive outdoor area that remains lively despite the scorching days of summer. There is a vast array of heat-resistant flowers to select from, ranging from resilient Zinnias to elegant Portulacas. With these options available, you can effortlessly enjoy a lively and vibrant garden without worrying about constant upkeep requirements.
These perennial herbs thrive in hot and humid environments and can grow well in different types of soil, including clay and sand.
Cannas require continuous moisture, and they can even be planted near or in water features or boggy areas of the garden.
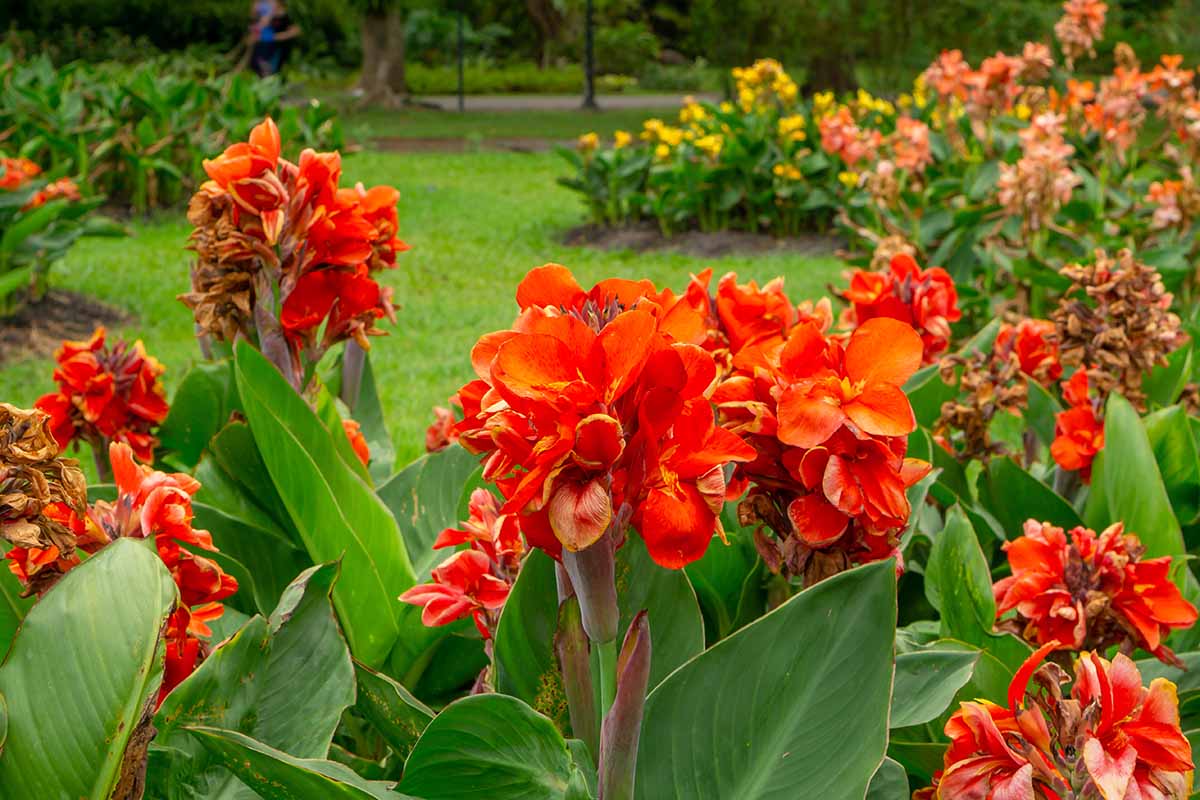
Anatomy-wise, these plants have rhizomatous roots, big leaves, and distinctive blooms. Unlike other flowers, most of the species’ blossoms appear to have three large petals clustered with staminodes or adapted stamens. The actual petals are small and inconspicuous, concealed by the showy stamens.
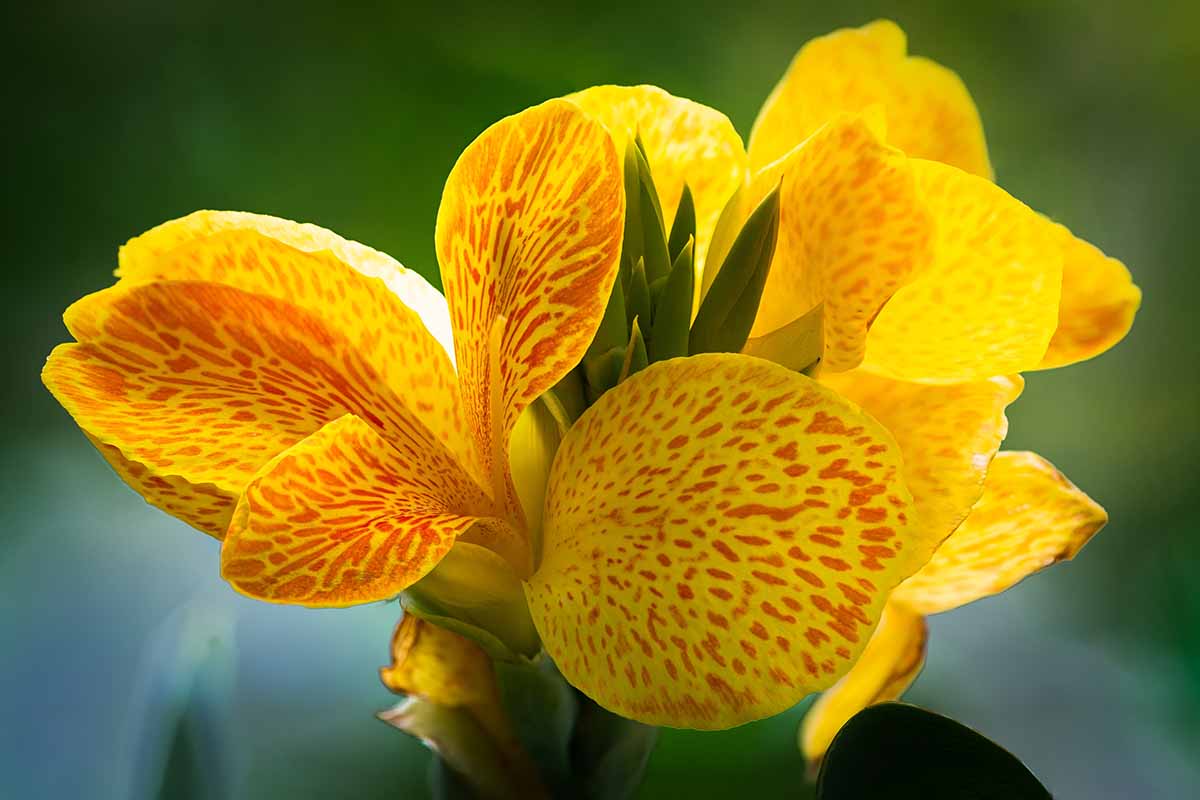
Certain types of flowers, namely C. amabilis and C. paniculata, are known for their narrow staminodes and ability to produce numerous blooms on a single inflorescence. These flowers, also called Indian shot or arrowroot, are especially popular among pollinators like hummingbirds due to their open-throated design. In addition to their vibrant colors and patterns, the foliage of these flowers is equally impressive. Each new leaf emerges as a curled tube, unfurling to reveal its unique color and pattern. Some varieties of these flowers boast truly unique color patterns that are sure to catch the eye.
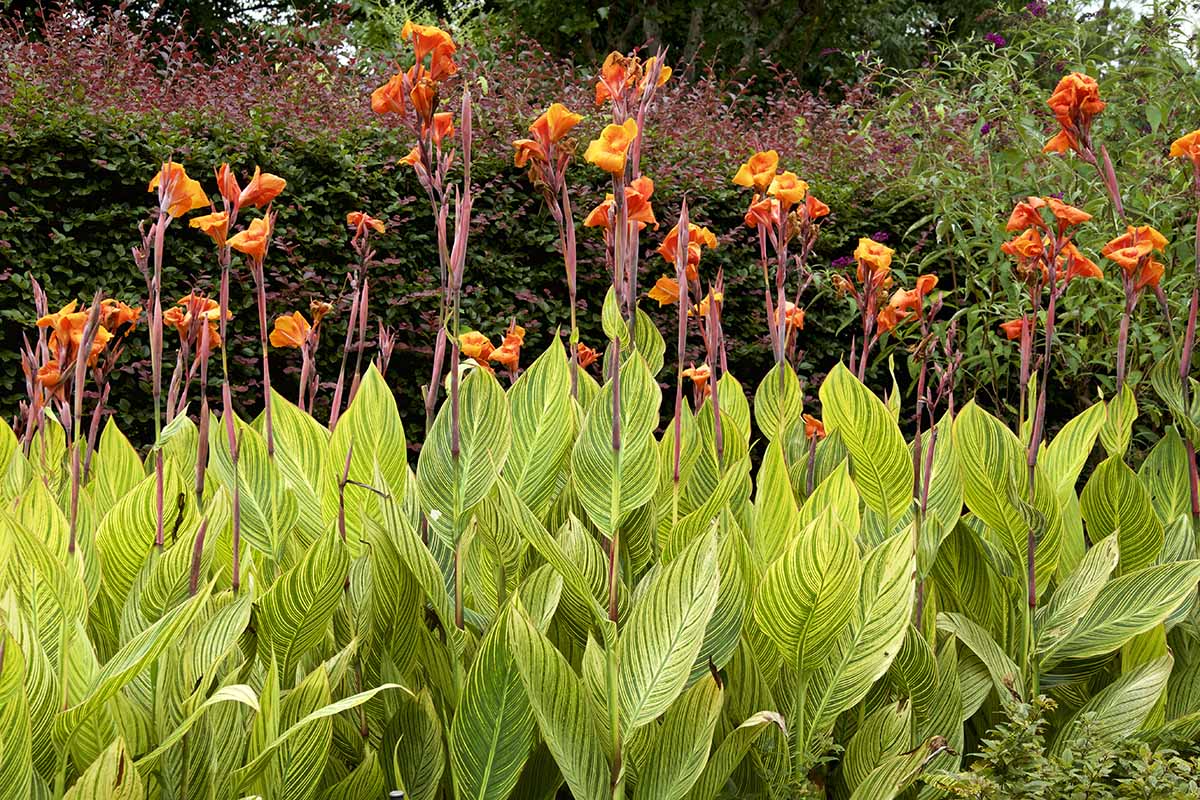
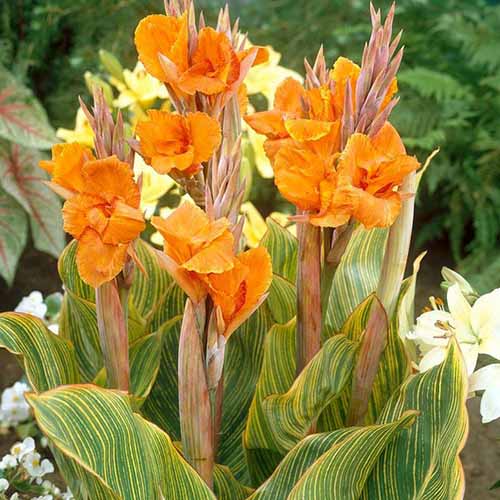
The ‘Phasion’ variety of C. indica is absolutely stunning with its purple stems, orange inflorescences, and variegated leaves in shades of orange, yellow, and burgundy. It looks like something straight out of a tropical fairy tale! The stalks that support the leaves and flowers are also impressively thick and strong, often measuring over an inch in thickness and coming in vibrant hues of green, purple, and red.
The size of the leaves of this plant typically ranges from one to four feet in length and 10 to 12 inches in width, with some plants spreading over three feet in width. The height and spread of different species and cultivars may vary, with dwarf cultivars remaining under four feet and taller ones towering over seven feet tall, and wild specimens reaching almost 10 feet. Now, let’s delve into their history and uses. Originally from southern North America, Central America, and northern South America, C. indica’s tuberous corms have been used as a food source for centuries by native communities before being discovered by foreign explorers.
The origin of cannas can be traced back to the Americas, where the first known specimens were found and sent to Europe during the mid-1500s. Despite uncertainty surrounding how they arrived in Europe, botanists took immediate interest in cultivating these plants. However, it wasn’t until the 1800s that cannas became popular in gardens. Due to frequent crossbreeding among different species, most botanical names use the hybrid name C. x generalis. Cultivars are categorized into 10 groups based on foliage color and type, growth structure, and region of cultivation. Interestingly, some African and Middle Eastern cultures use the seeds as filler for percussion instruments similar to maracas. Wild cannas can grow up to 10 feet tall, producing relatively small blooms compared to those of cultivated varieties. Over the past two centuries, botanists and breeders have been continuously crossing specimens to enhance advantageous traits, such as bloom size reduction, height reduction, and cold hardiness improvement.

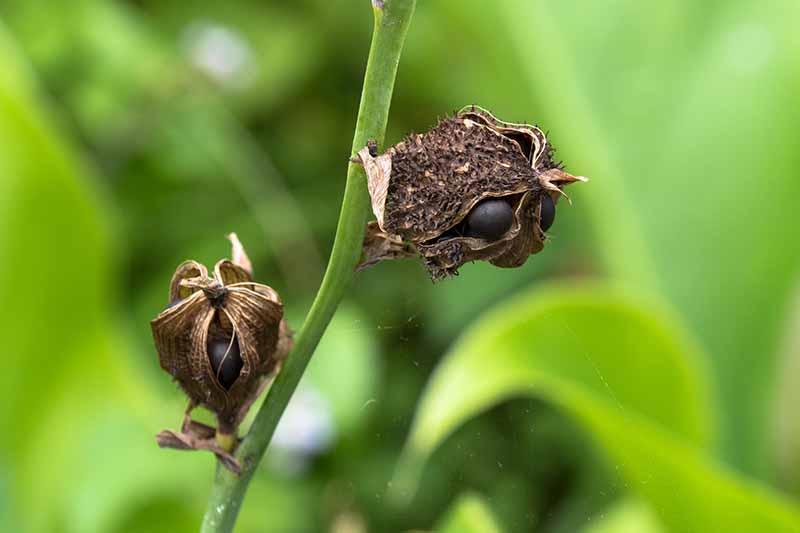
Some species of canna plants produce edible leaves, flowers, and roots that are commonly used in agriculture. Additionally, the starchy roots of canna plants can be a cost-effective substitute for arrowroot and are often used as a food source for livestock. In their natural habitat, cannas tend to grow in semi-wetland environments, spreading out along riverbanks and lake beds. Certain species, such as C. flaccida, can even thrive partially submerged in boggy areas. These plants have the added benefit of filtering harmful toxins and pollutants from their environment, making them a great choice for planting in wetland areas to help purify the substrate. Under optimal conditions, these plants will produce beautiful blooms that are self-pollinated to create seed pods. However, the seeds themselves are incredibly hard and almost impossible to penetrate due to their tough outer coating, measuring about one-quarter of an inch in diameter.
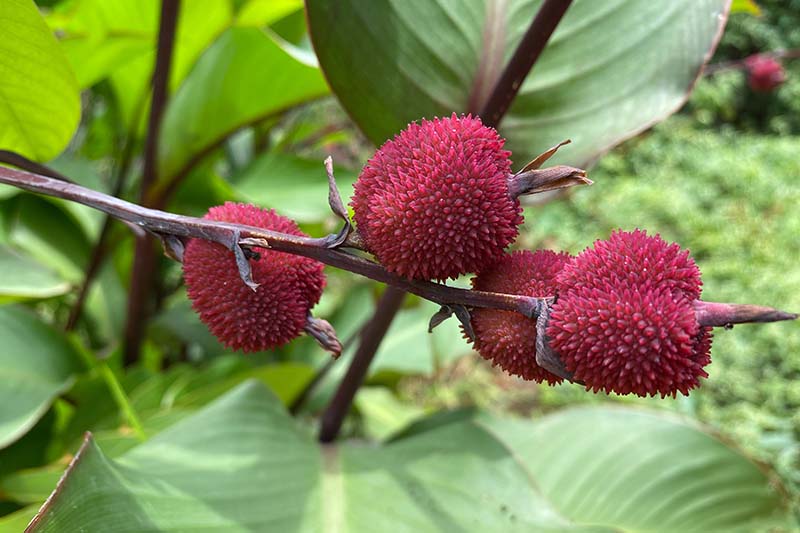
The natural process of self-seeding in the wild occurs when the pods of a plant dry up and break open, causing their contents to scatter onto the soil below. In swampy environments, the moist substrate decomposes the sturdy outer layer of the seed coat, enabling it to absorb water and sprout into new life. To that end, let’s delve into home propagation and explore the most effective techniques. While cannas do produce seeds, their extensive history of hybridization and crossbreeding means that any offspring resulting from such seeds may not possess the desired traits of their parents. Consequently, it is advisable to commence propagation using rhizome division. However, if you’re curious about what results will arise from planting seeds, we’ll provide some directions for that as well. We’d be thrilled to see your findings, so don’t forget to leave us a comment complete with some pictures! Bear in mind that certain cultivars and hybrids are often sterile. To obtain seeds, gather them from ripe pods of a fecund plant when they naturally burst open, typically between mid to late winter.
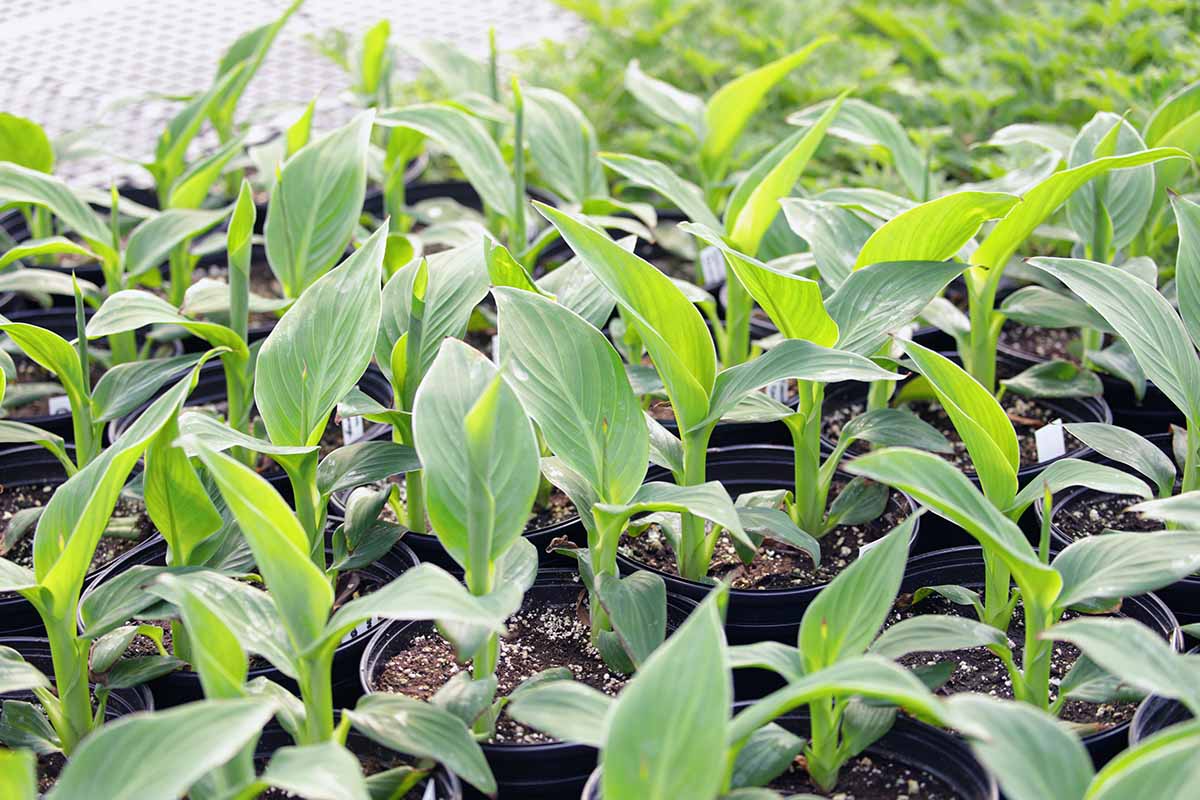
To initiate germination of seeds, start by making a small cut on the thick seed coat using a sterilized garden knife, and then soak them in water for 24 hours. Alternatively, you can immerse the seeds in almost boiling water to dissolve the protective layer quickly. Once done, let the water cool and soak the seeds for 24 hours. Next, sow each seed in a separate container or cell, press them approximately a quarter-inch deep in a mixture of one part coconut coir to one part sand or perlite while ensuring that the soil is damp. Cover the container with plastic film and place it in a warm area with consistent temperatures of about 70°F to promote germination. After seven to 14 days, remove the plastic covering, and relocate the seedlings to a spot with at least six hours of sunlight per day, or use a grow lamp. Once the seedlings reach a height of five to seven inches, transplant them outdoors in spring while maintaining adequate soil moisture.
Another method of propagating plants is through rhizome divisions. Rhizomes create offshoots that develop into new plants. You can separate each offshoot because they have their roots, making it easy to create individual plantings. Dividing rhizomes ensures that parental traits are maintained and reduces the time taken to reach maturity. Therefore, blooms will appear earlier than those grown from seeds. To divide rhizomes, gently separate them into sections and plant each section where it will receive adequate sunlight and maintain sufficient soil moisture.
It is recommended to separate corms every few years. This should be done during dormancy, after the foliage has died back. After digging up the corms, rinse them off to locate segments where new offshoots have formed. These will look like smaller, bulb-like nodules with an eye at the top for new stems to grow from. Using a sharp and sterilized garden knife, cut between the nodule and the main rhizome, ensuring that each tuber you cut includes some roots and an eye. The newly split corms should be left to callus for a few days before potting or transplanting.
For transplanting, wait until any danger of frost has passed. If planting in-ground, dig a hole of about three to four inches deep, or as wide and deep as the cell or root system. Do not bury the roots more deeply than they were before. Backfill with soil, press the transplant in place, and water it in well. Provide one to two inches of water per week if there is no rainfall. Cannas also grow well in pots. Choose a container large enough to provide adequate space and stability. Ensure that the planter has good drainage but does not dry out too quickly.
In regions where temperatures remain consistently above 40°F and there is ample sunlight and water, canna lilies can be planted outdoors. These plants do best in zones with heat and humidity and do not require much protection except during unexpected cold snaps.
If you live in Hardiness Zones 6 to 8, you might encounter low temperatures that could potentially harm your plants. This is why winterizing becomes crucial in these areas. However, cannas can grow in various soil conditions. Whether you have sandy or clay soil, adding organic materials such as compost can ensure that the necessary nutrients are available. These plants thrive in temperate zones with plenty of sunlight, so it’s best to place them in an area where they receive eight hours or more of direct sun exposure per day. Canna lilies are non-toxic to both pets and people, although not all species are edible. While they don’t require much attention, they prefer nutritious soil during their active growth and blooming period. The optimal soil pH for these plants is between 6.0 to 6.5. To provide extra nutrients to the soil, you can add two to four inches of compost or well-rotted manure around the base of the plants during late winter or early spring and again in midsummer.
To ensure the adequate supply of nutrients for your canna lilies, you may opt to use Geoflora BLOOM fertilizer (3-5-5 NPK), which can be purchased in various sizes from Arbico Organics. Follow the instructions on the package when applying commercial fertilizers. For further tips on fertilizing canna lilies, click here.
When planting canna lilies in warmer climates, it is best to choose a partially shaded area with consistently moist soil. In cooler climates, a sunny location that receives at least 8 hours of direct sunlight per day is preferable. To prevent the spread of rhizomes, consider growing canna lilies in containers. Water them with 1-2 inches of water per week in the absence of rain to avoid dry substrate.
Pruning is a crucial step in improving blooming for canna lilies. From late spring to fall, observe the condition of the flowers and foliage and remove dead leaves using a sterile garden knife or pruning shears to make room for new growth. Remember that it is not always necessary to prune herbaceous species regularly, but it is essential for canna lilies.
After the blooms have died, cut the entire flower spike out at the base, but keep in mind that some varieties are self-cleaning. Be sure to remove only the dead flowers, leaving any unopened buds if you plan to collect seed. Pruning encourages new growth and reduces pest and disease problems. Divide rhizomes every three to four years, and avoid planting near waterways to prevent invasive spreading. To control spreading, plant in containers using a light substrate mix, burying the rhizome three to four inches deep with eyes facing up. Winter care is important in cooler zones, as cold weather can damage or kill the rhizomes. In colder regions, dig up corms for storage after the first frost or cover them well if the ground does not typically freeze. It’s possible to create a microclimate by installing near a wall or fence, but not in regions with temperatures below freezing.
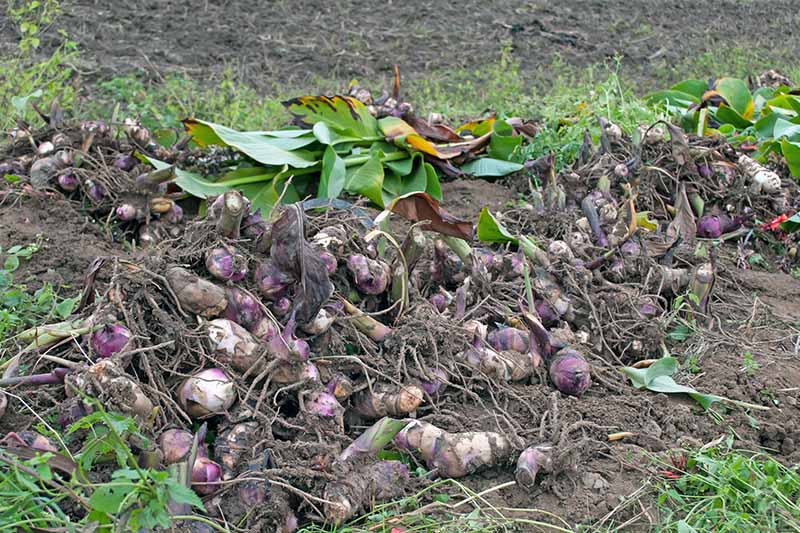
During autumn, when the weather starts to get colder, trim the stems down to two or three inches. Carefully remove the tubers, wash them off, and let them dry completely. Keep them in a paper bag with one or two cups of coconut coir in a cool, dry place, like the basement, until spring arrives. Alternatively, if you live in an area where the ground doesn’t freeze, cut the stems just above the ground and cover them with two to four inches of shredded wood or straw mulch. In spring, move the mulch away from the crowns to allow sunlight to reach them. If you’ve removed the tubers, soak them in warm water for an hour or two before replanting in the spring. For container-grown plants, trim them to two inches above soil level and move them to a sheltered, cool spot for the winter.
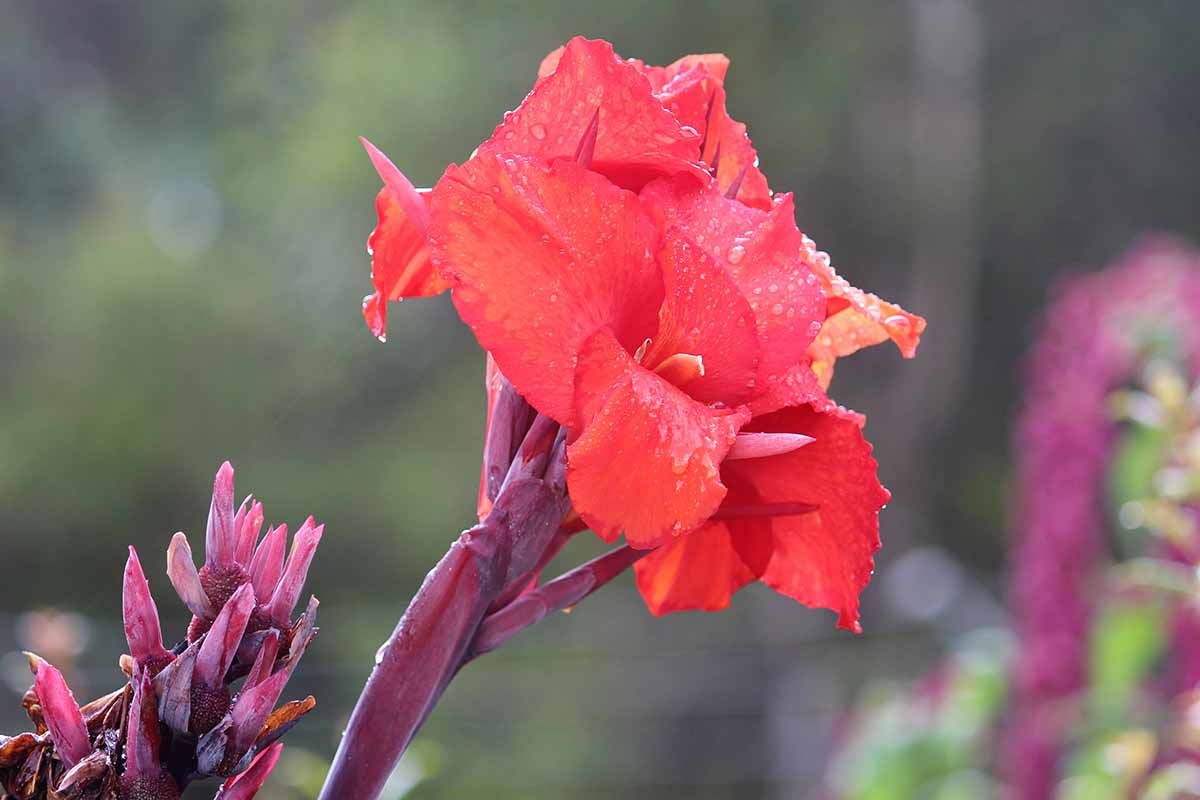
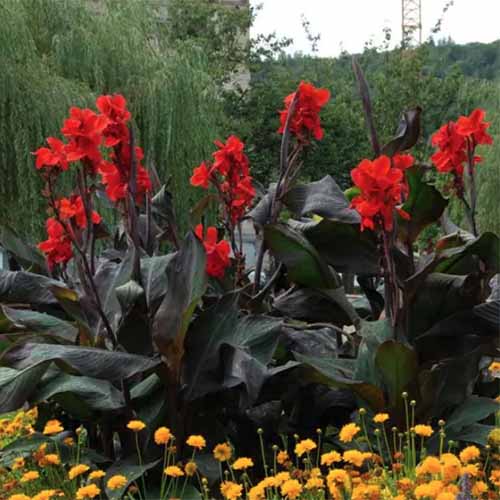
Now it’s time to choose which variety to add to your garden or landscape. It can be difficult to recommend just a few, but here are some options that will bring tropical style to any space and attract attention even when not in bloom. All of the cultivars listed below are suitable for Zones 4 to 11 with winter protection or storage in areas north of Zone 8, unless specified otherwise. If you want a cultivar that stands out for its color even when not flowering, ‘Black Knight’ is a great option. Its stems and paddle-shaped leaves are almost black, with stunning deep red blooms on four to six-foot-tall stems.
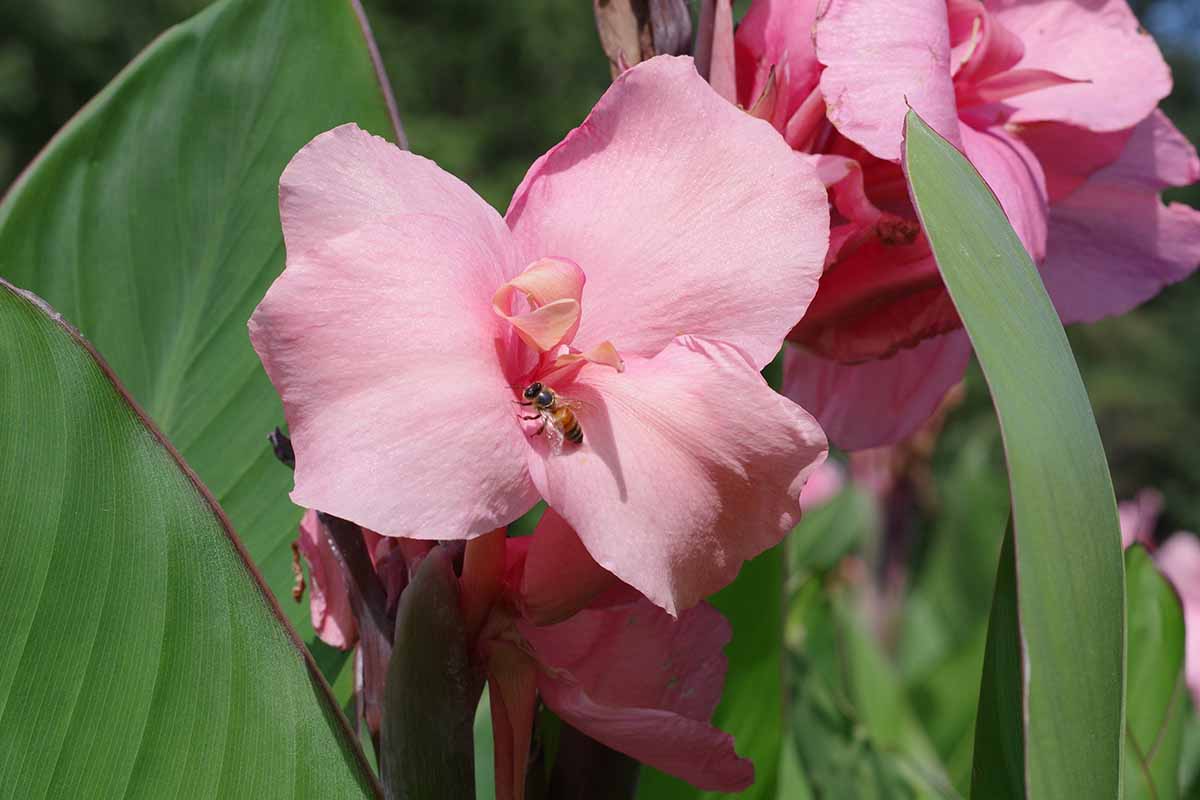
Looking for a way to create a stunning backdrop or mass planting? Look no further than the ‘Black Knight’ tubers, available in a five-pack from the Bloomsz Store on Home Depot. For a focal point with beautiful bloom color, consider the ‘City of Portland’ cultivar with its orange to deep salmon pink flowers and soft green foliage. You can purchase ‘City of Portland’ tubers in a three-pack from the Holland Bulb Store on Amazon. If you’re looking for a dwarf cultivar perfect for containers, try the ‘Lucifer’ with its deep red blooms and lush green foliage. ‘Lucifer’ rhizomes are also available in three-packs from Holland Bulb Store via Amazon. Another stunning cultivar is the ‘Picasso’ with its bright yellow staminoids and red spotting. Find tubers available in sets of three from Holland Bulb Store via Amazon. Finally, for maximum impact, consider the ‘Pretoria’ cultivar with its variegated, paddle-shaped foliage striped in tones of light and dark green interspersed with bright yellow. The blossoms are deep orange with a paler yellow-orange margin, and this cultivar can reach more than six feet in height.
If you’re looking to add some greenery to your garden, consider planting ‘Pretoria.’ This plant can thrive in Hardiness Zones 2 to 11, but make sure to prevent the corms from freezing. You can easily get your hands on tubers from Eden Brothers in sets of two, four, or 10.
For a more vibrant look, try out ‘Wyoming.’ This plant boasts beautiful blooms and colorful foliage with green, purple, and bronze stripes. The bright orange blossoms that pop up in spring and summer are a sight to behold. Give your garden a burst of color with ‘Wyoming.’
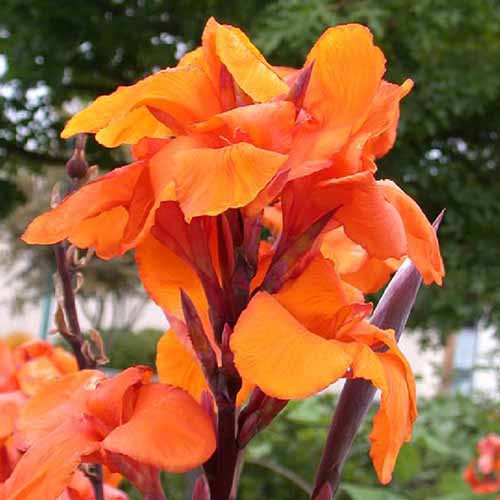
The Wyoming cultivar of canna lilies thrives in full sun and is hardy in Zones 7 to 11, with a height range of three to four feet. You can purchase packages of two, four, or 10 rhizomes (also called bulbs) from Eden Brothers. While canna lilies are generally pest-free, some herbivores like squirrels, mice, and voles may snack on the starchy roots, so using underground barriers like stainless steel root guard baskets from Amazon or container growing may be necessary. However, these measures may not always deter squirrels. Regularly dividing the rhizome clusters can prevent overcrowding. Leafrollers, such as the Brazilian skipper or canna skipper, can also be a problem for canna lilies. The larvae hatch from eggs laid in the spring and summer, and there are two types of adults. Learn more about how to protect your garden from Japanese beetles and leafrollers in our guide.
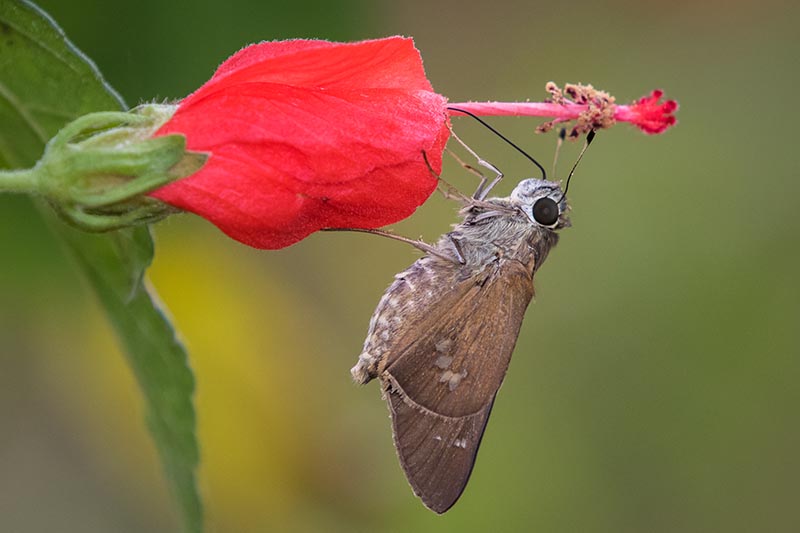
The eggs laid by adult skippers are blue-green and are visible on the undersides of leaves. These tiny eggs turn pink before hatching, making them easy to spot. If spotted, they can be removed by scraping or smashing. The larvae of Brazilian skippers are usually dark in color and can grow up to one inch long. They chew on the edges of canna leaves and fold the freed flap down to tack it in place around themselves for pupation. As they grow, they need to create a new roɩɩed flap which can devastate foliage if there is a small infestation. The adult lesser canna leafroller is a brown moth that lays flat, clear to whitish-yellow eggs on the upper surface of leaves. The larvae chew margins of leaves and roll the entire leaf over using visible silk to pin it from the outside. It is important to remove dead plant material as these larvae are known to overwinter in them. Both types of larvae can be eliminated by plucking them off the leaves and placing them in a tray for birds to eat. In severe cases, spraying plants with “Bt” (Bacillus thuringiensis) can help control the infestation.
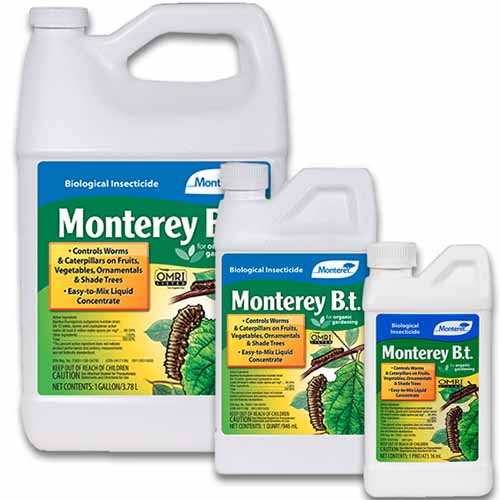
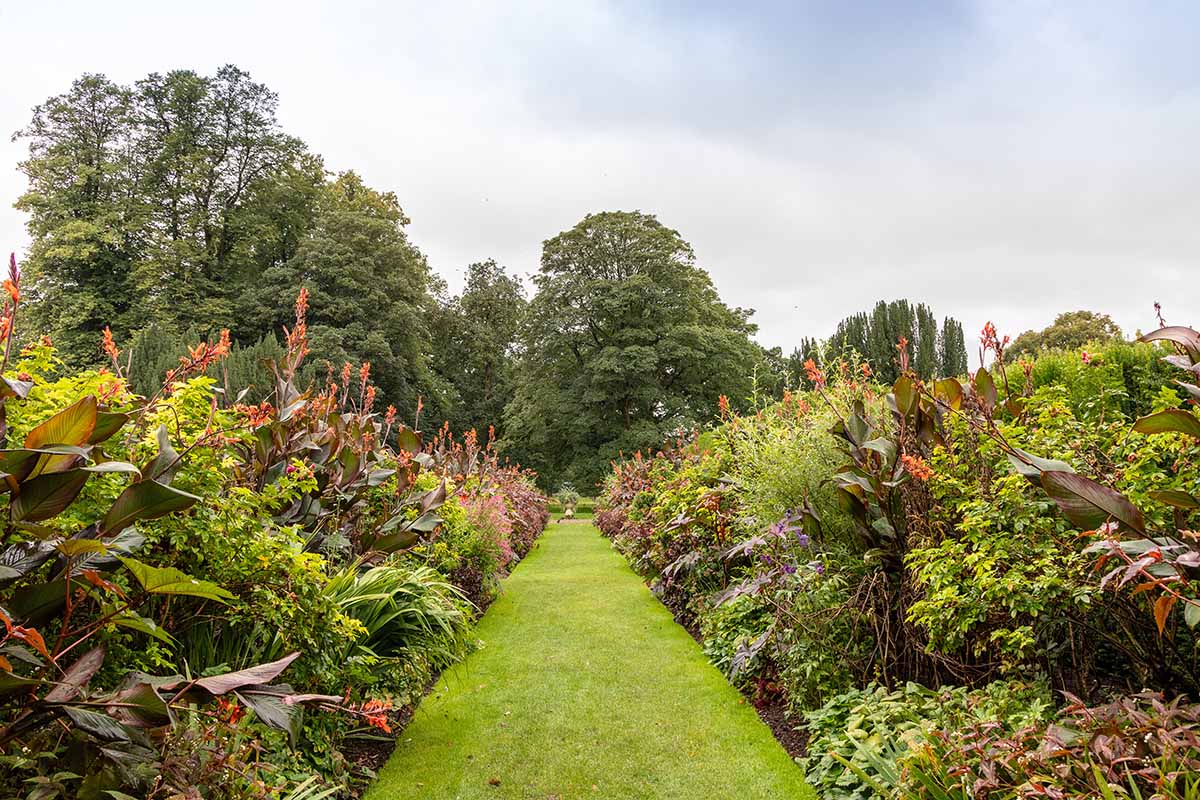
Arbico Organics offers Monterey Bt Liquid Concentrate in different sizes, including pints, quarts, and gallons. In cases of severe infestation, cutting plants down to the ground with a sterile knife or shears can deter adults from laying eggs and make a lasting difference. It is important to dispose of pruned material properly. Neem oil can also be used as a preventive barrier early in the season and after rain to reduce the chance of infestation. When it comes to diseases, canna rust is one of the major threats, which can be difficult to eradicate without cutting the entire plant back to the ground. Viruses such as canna yellow streak or yellow mottle have no cure and require removal of the infected plants. Adequate spacing between plots can help prevent virus transmission. Cannas work well in tropical gardens when paired with other plants such as elephant ears, sedges, Florida shield ferns, viburnums, and calla lilies for a colorful and texturally interesting bed. For more information on pests and diseases of canna lilies, check out our guide.
Opting for container gardening is a fantastic idea. You can either plant them separately or in combination with liriope, marsh marigolds, and bergenias for a lush and full container garden. These plants are perfect for areas with damp soil and full or partial sunlight. They are also ideal for creating a border around ponds or pools, providing shelter and privacy for aquatic animals such as koi fish.